Years of experience in "Digital Technologies"
Proficient technical engineers
Satisfied clients across the world
Projects in web
& mobile
Fill the form, our experts would reach you soon
We assure to have your info safe with us
Introduction:
If you are using a WordPress website then this post could help you with managing your website stuff in a better way. Being a WordPress user you might have come across a very common problem. It is “How do you get the insight of all your website content at one glance?”

There is no possible way of getting your entire content about your pages, Articles and user comments. This makes checking all associated fields complicated. You might find it more difficult if you are going to check this for a specific page.
In this post let us discuss on customizing solutions and about a plugin that is all set to overpower this problem.
The modern WordPress website is good at the content than just holding titles or chunks of texts. The plugins have functionalities that WooCommerce introduced. It performs well in storing contents like prices, subtitles, additional images and henceforth. But how do you track information when you are able to view only the title, date and author, in your admin panel?
It is obvious that you cannot overview any other information, yet you could get rid of these problems. If you lack coding knowledge then I can explain to you, “how to configure using admin column plugin”. The post also explains you the following,
Inspiring use case:
Let’s start with an example, say you are given a task to manage a website which deals with real-estate agency portfolio. On your website, you display locations, images, addresses and many other attributes. Whereas, on the admin screen, you can manage a portfolio and even control existing real estates.
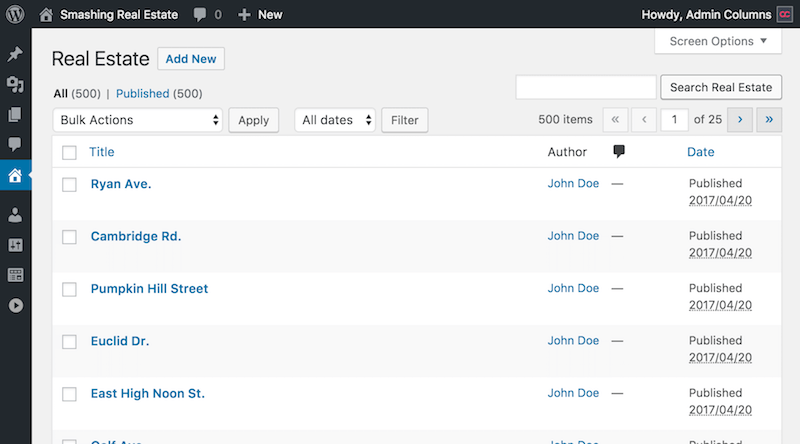
The columns on WordPress appears by default and are barely relevant to your real-estate website. Find the following image which is the current strategy of a WordPress Blog. On the admin panel, you could find the portfolios with no information in it.
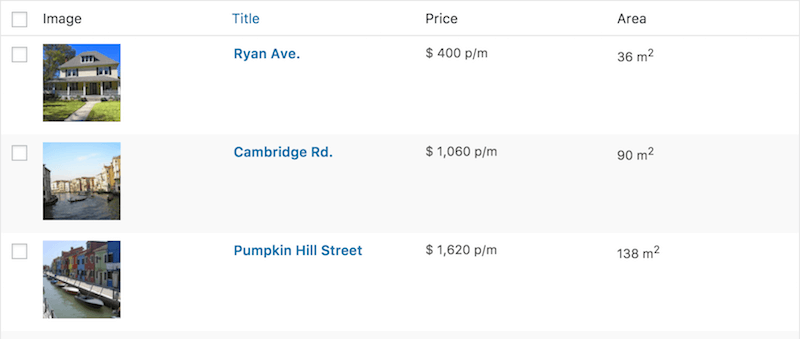
The same happens in case of car dealerships, creative portfolios, web shops and so on. So let us work on the real-estate portfolio which has an overview like the one in the below image.
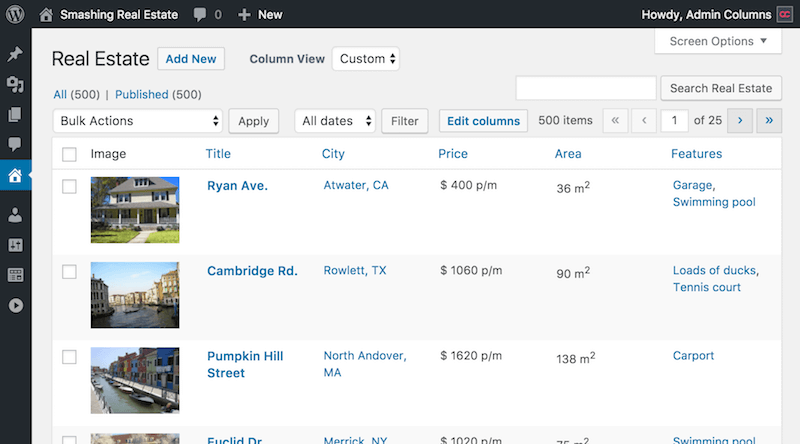
When you go through this image you find a lot of insight in the portfolio. It is much easier to find, validate and even edit as you see them. I would provide you instructions on adding custom columns on WordPress that you might sort them and add custom filters. I would also guide you on how to make use of the plugin to handle with Admin Panel.
How to handle columns with code?:
Adding columns and editing them according to your content is required. To perform this, WordPress offers a column application. Yet, you could perform these tasks using certain WordPress Hooks.
To alter or add columns make use of manage_[post_type]_posts_columns and manage_[post_type]_posts_custom_column.
At [post type], enter the post type that you wish to point. For example, for pages, you could make use of manage_page_posts_columns and manage_page_posts_custom_column.
You need to use this hook manage_posts_columns as a filter that handles an array of columns. The standard array of filter you need to use is as follows,
[
  [cb]          => <input type="checkbox" />
  [title]       => Title
  [author]      => Author
  [categories]  => Categories
  [tags]        => Tags
  [comments]    => [..] Comments [..]
  [date]        => Date
]
You can remove a few columns in order to add a few. To do so you need to add a call back to the manage_posts_columns filter and add custom columns to columns array. You are about to use the manage_realestate_posts_columns hook. Here the post type is represented as “real estate”, which is passed as the first argument to register_post_type function for registering custom post types. We use it in place of post type in manage_[post_type]_posts_columns filter.
add_filter( 'manage_realestate_posts_columns', 'smashing_filter_posts_columns' );
function smashing_filter_posts_columns( $columns ) {
  $columns['image'] = __( 'Image' );
  $columns['price'] = __( 'Price', 'smashing' );
  $columns['area'] = __( 'Area', 'smashing' );
  return $columns;
}
The first line includes a function smashing_filter_posts_columns which is the callback filter that handles columns displayed. The next line defines the callback function. Lines 2 to 4 add custom columns to the list of columns. At last, line 6 returns to resulting column. The ultimate purpose of adding columns is to display image, price, area, and array with the new columns that have returned.
There are two more things to be reviewed:
We are not definite about removing the above-mentioned columns rather construct an entirely new array of columns precisely as needed.
add_filter( 'manage_realestate_posts_columns', 'smashing_realestate_columns' );
function smashing_realestate_columns( $columns ) {


    $columns = array(
      'cb' => $columns['cb'],
      'image' => __( 'Image' ),
      'title' => __( 'Title' ),
      'price' => __( 'Price', 'smashing' ),
      'area' => __( 'Area', 'smashing' ),
    );


  return $columns;
}
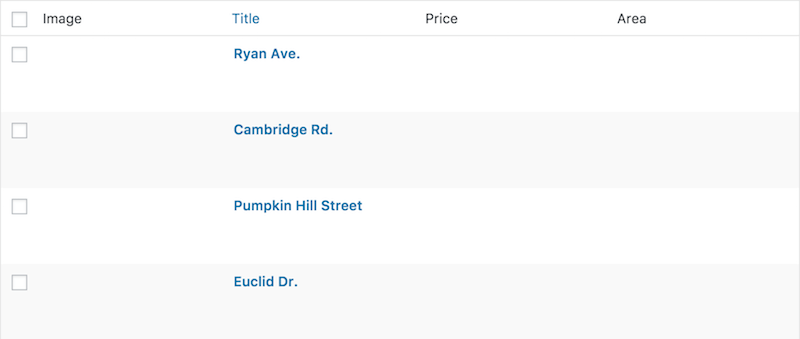
Finally, the overview screen looks the way it is shown below. Unnecessary columns are removed and the new ones are added to the exact position where it has to be.
Populating columns:
The next step is to populate columns. WordPress can also help you with it using a Hook, which is the manage_[post_type]_posts_column action. As stated above this is not a filter and this can help you add content and does not allow you to change it. Thus, we are going to echo column content that we wish to display. Let’s get started with the column content.
add_action( 'manage_realestate_posts_custom_column', 'smashing_realestate_column', 10, 2);
function smashing_realestate_column( $column, $post_id ) {
  // Image column
  if ( 'image' === $column ) {
    echo get_the_post_thumbnail( $post_id, array(80, 80) );
  }
}
I have added a callback function smashing_realestate_column to ‘manage_realestate_posts_custom_column’ fetching two parameters which are the column name and the post ID. It is indicated in the fourth parameter add action. This indicates the number of arguments expected for a callback function.
The third parameter which is the priority hook determines the order of callback functions registered to the hook, must be accomplished. The callback function populates the “Image” Column.
The other two columns “Price” and “Area” are stored as the function fields with price_per_month and area. The implementation process is quite similar to both columns.
add_action( 'manage_realestate_posts_custom_column', 'smashing_realestate_column', 10, 2);
function smashing_realestate_column( $column, $post_id ) {
  // Image column
  if ( $column == 'image' ) {
    echo get_the_post_thumbnail( $post_id, array( 80, 80 ) );
  }


  // Monthly price column
  if ( 'price' === $column ) {
    $price = get_post_meta( $post_id, 'price_per_month', true );

    if ( ! $price ) {
      _e( 'n/a' );
    } else {
      echo '$ ' . number_format( $price, 0, '.', ',' ) . ' p/m';
    }
  }
}
The same is done for the ‘Area’ column except for the unit. Otherwise, the code is the same for ‘Area’ column.
add_action( 'manage_realestate_posts_custom_column', 'smashing_realestate_column', 10, 2 );
function smashing_realestate_column( $column, $post_id ) {
  [...]


  // Surface area column
  if ( 'area' === $column ) {
    $area = get_post_meta( $post_id, 'area', true );

    if ( ! $area ) {
      _e( 'n/a' );
    } else {
      echo number_format( $area, 0, '.', ',' ) . ' m2';
    }
  }

}
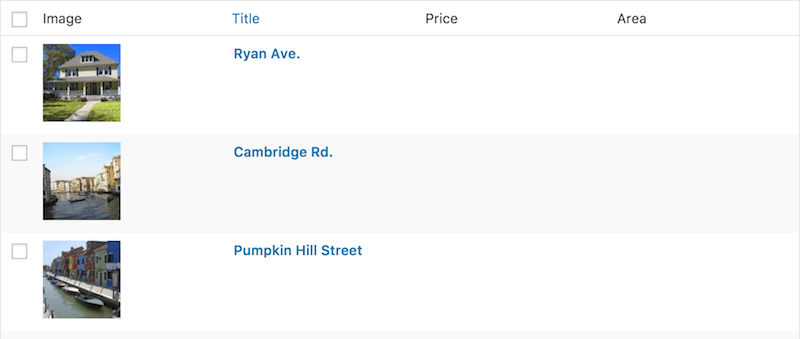
Finally, the overview of real estate page looks good with the relevant information that you wish to display.
Managing using admin column plugins:
Now let us have a look at how to manage columns using Admin Columns plugin. In this plugin, there is no requirement for codes and just use drags and clicks to manage columns. There are optional fields that help you to customize for naming a column and its behavior.
Let us dive in deeper to know how the plugin works. Before getting started install admin columns as you install the plugin and get it activated.
Adding, altering and removing columns:
Remove the unwanted columns that appear in the overview.
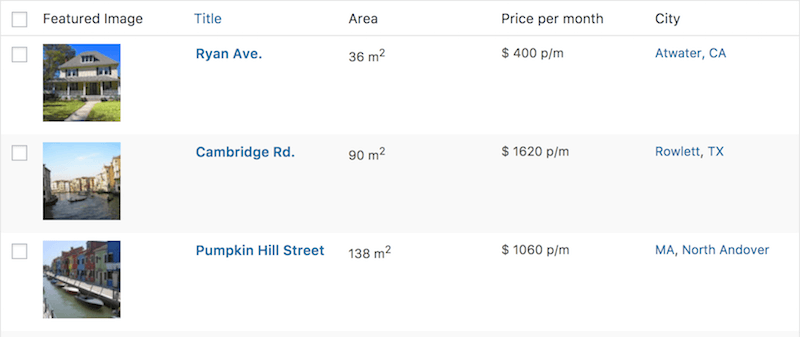
Isn’t that easy? Let us proceed by adding a column. To add a column click on the “Add Column” button and choose the “Featured Image” column type from the dropdown and fill the appropriate settings.
If you have followed me very closely, you would have noticed that we have missed adding the “City” column while using codes. That is a hectic task with coding but that really turns to be simple when done with a plugin. Select the “Taxonomy” column and choose the “City” Taxonomy.
The result is done. Isn’t that simple either?
Editing using admin columns:
In order to edit your content, you need to visit the edit page. Look out for the fields that you wish to change, update them using the update option and view them on the overview screen. You could get the entire process done in just three simple steps. Make use of Admin Columns Pro.
The above image helps you to better understand how it works. On the admin panel, you can switch inline editing from columns setting screen. The panel automatically detects the content and adds editability. The example involves the advanced custom fields add-on for admin columns. It detects the ACF files and adds the possible columns. The columns are sorted, filtered and edited automatically.
The final result looks really neat as you can make the process really simple with the admin columns pro. I have enabled editing for all custom columns and am going to make use of the functionality to edit all content. You can also perform the same and the changes are saved instantly.
Direct edit is upheld for all segments. With the Advanced Custom Fields and WooCommerce add-ons, Admin Columns gives you a local altering background as if you were altering from the points of the details page.
Final verdict:
Admin Columns on WordPress could do much better than any other plugins. There are few more WordPress plugins that you need to have a look at. Why not try them either? Hope this post about Admin column would assist you much better. Now make aligning an easier task on Admin panel.
If I have missed any of the valuable points do let me know. If you have really liked the post then come back to tell me about your success stories.